
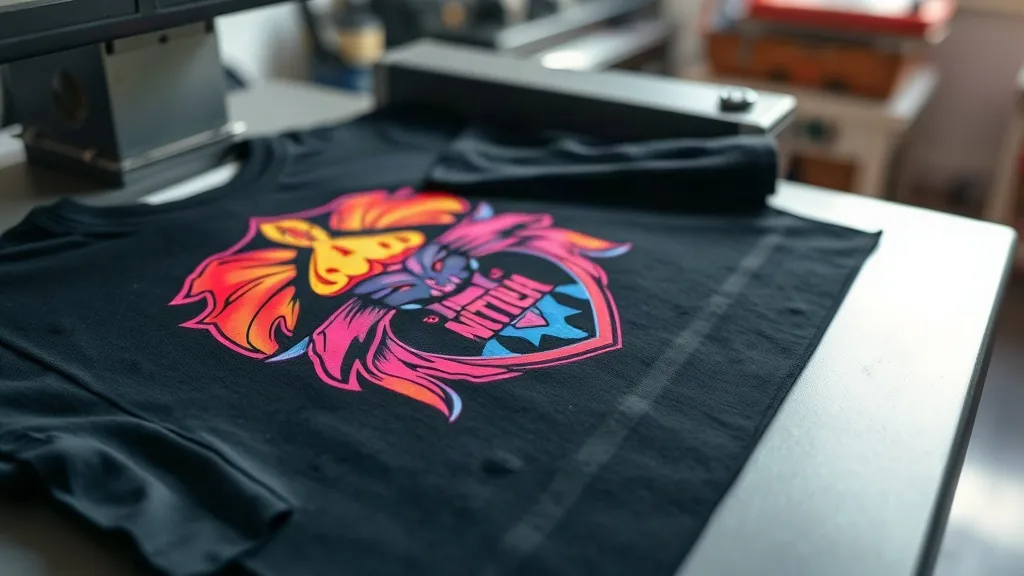
Custom apparel printing has evolved dramatically over the past decade, and one technology that has captured the attention of hobbyists and professionals alike is dtf printing. Unlike traditional methods that require specific fabrics or extensive setup, DTF (Direct to Film) transfers open up a world of possibilities for creating vibrant, long-lasting designs on almost any material. Whether you are running a small print shop, designing team uniforms, or simply want to personalize your own clothing, understanding DTF transfers can save you time, money, and frustration. In this guide, we will walk you through everything you need to know, from the basics of the process to advanced tips that ensure professional-grade results.
If you have ever tried iron-on transfers that peel after a few washes or screen printing that only works on cotton, you know the limitations of conventional methods. DTF transfers solve many of those problems by using a unique film-based approach that adheres to cotton, polyester, blends, and even treated nylon. The result is a soft, stretchable print that holds up to repeated wear. But how exactly does it work, and what should you consider before diving in? Let's break it down.
What Are DTF Transfers and How Do They Work?
At its core, DTF printing involves printing a design onto a special PET film using a modified inkjet printer with pigment inks. A powdered hot-melt adhesive is then applied to the wet ink, and the film is cured. Once ready, the transfer is placed onto the fabric and pressed with a heat press. The adhesive melts, bonding the ink to the fabric, and after cooling, the film is peeled away, leaving a vibrant, durable image. This process differs from DTG (Direct to Garment) because the design is printed on film first, not directly onto the shirt. It also differs from vinyl cutting because no weeding is required, and full-color, photographic designs are possible.
The magic of dtf transfers lies in their versatility. Because the adhesive is applied separately, you can print on dark colors without a white underbase, and the prints stretch with the fabric without cracking. This makes them ideal for athletic wear, where flexibility is key. Additionally, DTF transfers can be stored for weeks or months before use, allowing you to print on demand and avoid inventory waste.
The Step-by-Step DTF Process
To give you a clear picture, here is a simplified workflow:
- Design preparation: Create your artwork in a graphics program, ensuring it is mirrored if required by your printer's software. Most DTF printers handle mirroring automatically.
- Printing: Load the PET film into the printer and print using DTF pigment inks. The printer lays down a color layer followed by a white layer (if needed for opacity).
- Powder application: While the ink is still wet, sprinkle the hot-melt adhesive powder evenly over the design. Shake off excess.
- Curing: Place the film in a curing oven or under a heat source to melt the powder. This step is critical for wash durability.
- Transfer: Set your heat press to the recommended temperature (usually 150-160°C or 300-320°F) and pressure. Press the transfer onto the fabric for 10-15 seconds.
- Peel: After pressing, allow the transfer to cool completely (cold peel) or peel while warm (hot peel) depending on the film type. Most DTF films are cold peel.
Each step has its nuances, and small adjustments can make a big difference in the final quality. For instance, using too much powder can lead to a stiff feel, while insufficient curing causes the print to wash away. We will cover troubleshooting later, but first, let's explore why DTF has become so popular.
Why Choose DTF Transfers Over Other Printing Methods?
When you compare DTF to other decoration techniques, several advantages stand out:
- Fabric versatility: Works on cotton, polyester, blends, leather, and more. No need to stock different transfer types for different materials.
- No color limitations: Print full-color, photographic designs with gradients and fine details. Unlike vinyl, there is no weeding or layering.
- Durability: When properly applied, DTF prints withstand dozens of washes without fading or cracking. They stretch with the fabric, making them suitable for activewear.
- Cost-effective for small batches: No setup fees or minimum orders. You can print one-off designs as easily as a hundred.
- Speed: Once your printer is calibrated, you can produce transfers quickly, especially for complex designs that would take hours to weed by hand.
- Storage: Unused transfers can be stored for months, allowing you to print ahead and press on demand.
Of course, no method is perfect. DTF prints can feel slightly thicker than DTG on light garments, and the process requires a decent printer and heat press. But for many businesses, the benefits far outweigh the drawbacks. If you are looking to offer custom apparel without the limitations of vinyl or screen printing, DTF is a strong contender.
DTF vs. DTG vs. Vinyl: A Quick Comparison
To help you decide, here is a side-by-side look at key factors:
- DTF: Best for full-color designs on any fabric; requires printer, powder, and heat press; moderate cost per print; excellent durability.
- DTG: Best for cotton and cotton blends; requires specialized printer and pretreatment; higher cost per print; soft feel but limited on synthetics.
- Vinyl: Best for simple, single-color designs; requires cutter and weeding; low cost for small runs; durable but can peel on stretch fabrics.
As you can see, DTF shines when you need versatility and vibrant colors. It is particularly popular among entrepreneurs who want to offer a wide range of products without investing in multiple systems.
Essential Equipment and Materials for DTF Printing
Getting started with DTF requires a few key pieces of equipment. While the initial investment may seem high, it often pays off quickly if you are producing custom items regularly. Here is what you need:
- DTF printer: A dedicated printer that uses DTF pigment inks. Popular models include those from Epson, Roland, and specialized brands like Ving. Some people convert standard Epson printers, but dedicated DTF printers are more reliable.
- DTF ink: Pigment-based inks formulated for DTF. Using the wrong ink can clog the printhead or produce poor results.
- PET film: Special transfer film, usually 75-100 microns thick. It must be compatible with DTF inks and powder.
- Hot-melt adhesive powder: Available in fine and coarse grades. Fine powder is better for detailed designs; coarse powder for bold blocks.
- Heat press: A quality heat press with accurate temperature and pressure control. You can use a standard flat press; a clamshell or swing-away design works well.
- Curing oven or heat gun: For melting the powder. Some use a dedicated curing oven, while others use a heat press or a heat gun. Consistency is key.
- Software: RIP software (Raster Image Processor) is often included with printers, but you may need to adjust color profiles for best results.
Beyond the hardware, you will need a well-ventilated workspace, as the powder and inks can emit fumes. Also, consider a powder shaker machine if you plan to produce high volumes; it speeds up the process and reduces waste.
Choosing the Right DTF Printer
When shopping for a DTF printer, consider your production volume and budget. Entry-level printers (around $1,500-$3,000) are suitable for small businesses and hobbyists. They typically have a print width of 13-17 inches. Mid-range models ($4,000-$8,000) offer faster speeds and wider formats. High-end industrial printers can cost $15,000 or more but handle large rolls and continuous production. Look for a printer with a reliable printhead (Epson i3200 or similar), good support, and a warranty. Also, check the availability of consumables; you do not want to be stuck with a printer that uses proprietary film that is hard to find.
Step-by-Step Guide to Applying DTF Transfers
Once you have your transfers ready, applying them correctly is crucial for a professional finish. Here is a detailed walkthrough:
- Preheat the fabric: This removes moisture and wrinkles. Press the garment for 3-5 seconds at the transfer temperature.
- Position the transfer: Place the transfer on the fabric with the printed side facing up (adhesive side down). Use heat tape if needed to keep it in place.
- Press: Set your heat press to 150-160°C (300-320°F) with medium-heavy pressure. Press for 10-15 seconds. If you are using a home iron, you will need to apply firm pressure and move slowly, but a heat press is strongly recommended for consistent results.
- Peel: For cold peel films, wait until the transfer is completely cool (about 1-2 minutes) before peeling. For hot peel, remove immediately. Check your film's instructions.
- Post-press (optional): Some printers recommend a second press for 5 seconds with a protective sheet to improve wash durability. This step can also enhance the feel.
After application, inspect the print for any lifting edges. If you see issues, you can re-press for a few seconds. Allow the garment to sit for 24 hours before washing to let the adhesive fully cure.
Common Mistakes and How to Avoid Them
Even experienced users run into problems. Here are some frequent issues and solutions:
- Print peels after washing: Usually caused by insufficient pressure, incorrect temperature, or under-cured powder. Increase pressure and ensure powder is fully melted.
- Stiff feel: Too much powder or too thick ink layer. Use fine powder and reduce ink density if possible.
- Colors look dull: Incorrect color profile or expired film. Calibrate your printer and use fresh film.
- Adhesive residue on film: Not enough powder or uneven application. Ensure even coverage and shake off excess thoroughly.
- Film jams in printer: Humidity or static. Store film in a dry place and use anti-static measures.
By paying attention to these details, you can achieve consistent, high-quality results that keep customers coming back.
Applications and Creative Uses for DTF Transfers
DTF is not just for t-shirts. Its ability to adhere to many surfaces opens up a range of creative possibilities:
- Apparel: T-shirts, hoodies, leggings, sports jerseys, and even denim jackets.
- Accessories: Tote bags, hats, socks, and shoes (on smooth areas).
- Home decor: Pillow covers, canvas bags, and quilted items.
- Promotional products: Uniforms for teams, staff shirts, and event merchandise.
- Personalized gifts: Custom designs for birthdays, weddings, and holidays.
Because DTF prints are stretchable, they work well on performance fabrics like spandex and polyester blends. This makes them a favorite for dance studios, sports teams, and fitness brands. Additionally, the ability to print small details means you can create intricate logos and photographic images that would be difficult with vinyl.
Tips for Printing on Different Fabrics
While DTF is versatile, each fabric type may require slight adjustments:
- Cotton: Easy to work with; use standard settings. Pre-press to remove wrinkles.
- Polyester: Lower temperature (140-150°C) to avoid dye migration. Use a bleed blocker if needed.
- Blends: Treat like cotton, but test a small area first.
- Nylon: Requires lower temperature and sometimes a special adhesive. Test carefully.
- Leather: Use low temperature and light pressure; avoid over-pressing.
Always perform a test press on a scrap piece of fabric before committing to a full order. This simple step can save you from costly mistakes.
Frequently Asked Questions About DTF Transfers
How long do DTF transfers last on a shirt?
When applied correctly, DTF transfers can last for 50 washes or more without significant fading or cracking. Proper curing and using quality materials are key. Following the wash instructions (inside out, cold water, no bleach) will extend the life of the print.
Can I use DTF transfers on dark colors?
Yes, DTF transfers are excellent for dark fabrics because a white ink layer is printed underneath the color, ensuring vibrant colors without the need for a separate white underbase. This is one of the biggest advantages over DTG, which often requires pretreatment on darks.
What is the difference between hot peel and cold peel DTF film?
Hot peel film allows you to remove the carrier sheet immediately after pressing while the transfer is still hot. Cold peel requires the transfer to cool completely before peeling. Cold peel generally produces a smoother finish and is more common. Always check your film's specifications.
Do I need a special printer for DTF transfers?
While you can convert some standard inkjet printers to use DTF inks, it is not recommended for beginners. Dedicated DTF printers are designed to handle the thick pigment inks and have the necessary feed mechanisms for PET film. They also come with RIP software that simplifies the process.
How do I store unused DTF transfers?
Store them in a cool, dry place away from direct sunlight. Keep them flat to avoid curling. If stored properly, they can last for several months. Avoid high humidity, which can cause the powder to clump or the film to warp.
With these insights, you are well on your way to mastering DTF transfers. Whether you are a business owner or a DIY enthusiast, this technology offers a powerful way to bring your designs to life on a wide range of products. Remember, practice makes perfect, so do not be afraid to experiment with different settings and materials. Happy printing!